Lets face it, a lot of people on this forum suck at taking pictures. I know Dexterhunter made a guide to crop pictures but this guide will go in depth for noobs that don't even know how to take screenshots. Here we go!
STEP 1: Taking the Screenshot.
You really have two options here. One way is to just press the F11 button and just like that, the picture is taken. The F11 button can usually be found in the somewhat top right corner of the keyboard.

Just click that button while in RA2 and the screenshot should be taken.
The second option for taking the picture would be to click the print screen key. This option is a lot more annoying than F11, but for some people f11 doesn't work. It really is annoying because you can only take one picture at a time while using f11 gives you the choice of taking multiple pictures at once. Oh well. Again it can be found in the somewhat top right corner of your keyboard. Most of the time the key is labeled "Print Scrn"

Screenshot taken! On to step 2!
STEP 2: Opening the Screenshot.
There are two ways to do this also, one to each corresponding option in Step 1. If you took the picture using F11, open your RA2 folder. Look for the folder named "Screenshots". Guess what's inside of it! Yeah the screenshots you just took! Open it up and right-click on the screenshot you want to open. It should say "Open with" on the tab and you should click paint or any other picture editing program. I'll be using paint. The picture should now be opened in paint. Awesome!
If you used the Print Screen key, just open paint or whatever you are going to edit the picture with. Click that Square in the toolbox thats next to the the star. Then just right click and paste and your screenshot should be there.
Now that your screenshot is opened, lets make it smaller.
STEP 3: Making your screenshot Smaller.
From now on all the steps will be the same whether you clicked printscreen or F11.
Now that the screenshot is opened in paint, click that square box in the toolbox. Make a box around your bot as small as possible.

Now that you have the box just drag it to the corner.
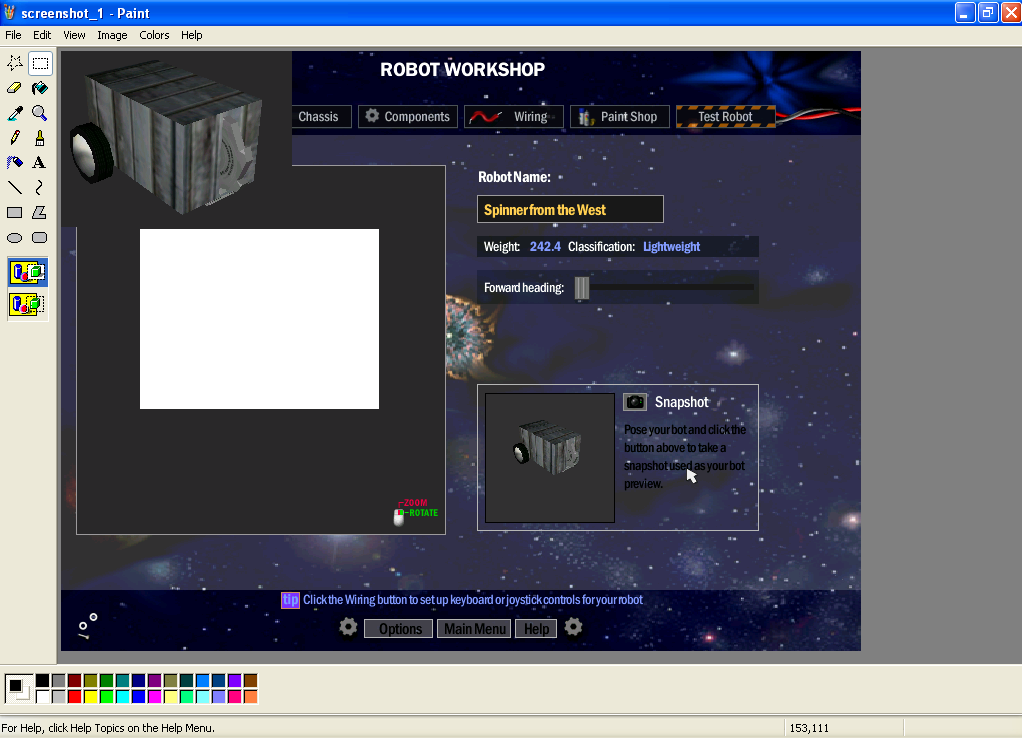
Now pull the box so the picture is as small as possible. If you want you can throw that weightclass box in the pic. Gives a bit more info.

Think your done? Not yet! Click file, save as and then name your picture what you want. Heres a very important part,
SAVE IT AS A .JPG OR .PNG. Jpg and Png files are much smaller than bmps and people around the forum like them more than bmps.

Your picture is now small and ready to upload!
STEP 4: 2020 editionGo use Wen's tutorial
hereSTEP 4: Legacy edition: Uploading the Screenshot.
You're so close! Just upload that pic onto the gametechmods image uploader!
To upload it just go to the front page of gametechmods.com. On your left there should be a list of links. Here you can download stuff, visit RA2 websites, among other things but we want to upload our pic. Find "Image Uploader" and click the link. Now you should come to a screen that has a line that says 'browse' next to it. Click that and find your picture. Now click upload and wait for your pic to be uploaded! Once uploaded it should give you three links. The last two are for links so we want the first one. Copy and paste that and move to the next step!
STEP 5: Legacy edition: Post It!
Now just post that line you just copied into your post. Click post and your pic should be there and look like this:

Smaller than those pics that show the whole workshop and just as much info. We all know what a robot workshop looks like in RA2 so we don't need to see it.
Follow this guide and you shouldn't have any reason to not have a small pictures.
You have no excuse!
If you see any mistakes tell me so I can fix them.
Thankyou
-SD
